はじめに
WebAssembly (wasm と略されることもあります) は “バイナリの命令形式” です。“仮想のスタックマシン” 上で動作します。コードが直接手で書かれることはありません。代わりに、さまざまなプログラミング言語からコンパイルされます。C 言語、C++、Go 言語 そして Rust (rustlang) などからです。付け加えて言うと、原義のアセンブリとはいくつかの点で異なっています。
“WebAssembly Core Specification” - version 1.0 というものが W3C から 2019 年 12 月 5 日に公開されています。WebAssembly の中心となる標準仕様に関して次のように書かれています:
a safe, portable, low-level code format designed for efficient execution and compact representation.
(私訳: 安全で、携帯性を備えた、低レベルのコード形式。効率的な実行と簡潔な表現を目指して設計されている。)
今日において WebAssembly が登場するのはたいてい Web ブラウザ上です。4 つのモダンなブラウザでサポートされています。具体的には FireFox、Safari と Chrome / Edge (後二者はいずれも Chromium がベース) です。(Roadmap は こちら (英語) です。)
WebAssembly は速度、実行の効率性、安全性の点で優れています。それゆえ JavaScript (ECMAScript) と協同して (置き換えて、ではありません)、オープンな Web の世界をよりすばらしいものにすることが期待されています。
さて Rust です。こちらは汎用プログラミング言語で、コードを WebAssembly にコンパイル することができます。Rust も高速で、効率的で、かつ安全性が高いです。さらに開発生産性も高いです。
この記事では Rust のコードから wasm を生成してそれをデプロイする流れを説明します。
環境
- OS: Artix Linux (Arch Linux ベース)
- App: Rust 1.66.0
- Webassembly: wasm-bindgen 0.2.83 / wasm-pack 0.10.3
- Node.js: 19.3
- Webpack: 4.46.0
チュートリアル
必要パッケージのインストール
Rust
Rust をインストールする方法は 2 つあります。rustup を使うか直接インストールするかです。(こちらの記事 が参考になるかもしれません。)
rustup を使う (推奨)
$ doas pacman -Sy rustup

$ rustup default stable
(代わりの方法) 直接インストール
$ doas pacman -Sy rust
wasm-bindgen (+ Node.js)
wasm-bindgen は、Rust から wasm をビルドする上で、“Wasm モジュール - JavaScript 間の高度なやり取りを支援” してくれます。別の言い方をすると、これが無いと console.log() を呼び出すことすらできません。
community リポジトリで取得できます。見てみましょう:
$ doas pacman -Ss wasm
以下のような内容が出力されるでしょう:
world/rust-wasm 1:1.66.0-1
    WebAssembly targets for Rust
galaxy/rustup 1.25.1-2 [installed]
    The Rust toolchain installer
extra/rust-wasm 1:1.66.0-1
    WebAssembly targets for Rust
community/rustup 1.25.1-2 [installed]
    The Rust toolchain installer
community/wasm-bindgen 0.2.83-1
    Interoperating JS and Rust code
community/wasm-pack 0.10.3-2
    Your favorite rust -> wasm workflow tool!
community/wasmer 3.1.0-2
    Universal Binaries Powered by WebAssembly
community/wasmtime 4.0.0-1
    Standalone JIT-style runtime for WebAssembly, using Cranelift
上の wasm-bindgen をインストールします。こちらを実行してください:
$ doas pacman -Sy wasm-bindgen
出力は以下の通りでした:
(...)
Packages (3) c-ares-1.18.1-1  nodejs-19.3.0-1  wasm-bindgen-0.2.83-1
(...)
:: Processing package changes...
(1/3) installing c-ares                                            [#####################################] 100%
(2/3) installing nodejs                                            [#####################################] 100%
Optional dependencies for nodejs
    npm: nodejs package manager
(3/3) installing wasm-bindgen                                      [#####################################] 100%
Node.js が一緒に来ていますね。
wasm-pack
WebAssembly のパッケージをビルドして公開するのに使います。以下を実行してインストールしましょう:
$ doas pacman -Sy wasm-pack
出力は以下の通りでした:
(...)
Packages (1) wasm-pack-0.10.3-2
(...)
:: Processing package changes...
(1/1) installing wasm-pack                                         [#####################################] 100%
Yarn
こちらはスキップもできます。node タスクで代用できます。
yarn を使いたい場合、以下を実行してください:
$ doas pacman -Sy yarn
出力は以下の通りでした:
(...)
Packages (1) yarn-1.22.19-1
(...)
:: Processing package changes...
(1/1) installing yarn                                              [#####################################] 100%
これで必要なインストールがすべて終わりました !!
cargo の lib プロジェクトを作成
ライブラリとしてプロジェクトを作成します:
$ cargo new wasm-example --lib
出力は以下の通りでした:
Created library `wasm-example` package
実際に生成されたのは以下の内容でした:
├─src
├───lib.rs
└─Cargo.toml
進みましょう:
$ cd wasm-example
wasm-bindgen を依存パッケージに追加
まずこちらを編集します:
$ nvim Cargo.toml
そして以下の行を追加します:
  [package]
  name = "wasm-example"
  version = "0.1.0"
  edition = "2021"

  # See more keys and their definitions at https://doc.rust-lang.org/cargo/reference/manifest.html

+ [lib]
+ crate-type = ["cdylib"]
+
  [dependencies]
+ wasm-bindgen = "0.2.83"
JavaScript の関数を wasm-bindgen 経由で呼び出す
次に中心となる src のファイルを編集します:
$ nvim src/lib.rs
もとの内容を以下のように書き換えてください:
use wasm_bindgen::prelude::*;

#[wasm_bindgen]
extern "C" {
    fn alert(s: &str);
}

#[wasm_bindgen]
pub fn greet(name: &str) {
    alert(&format!("Hello, {}!", name));
}
ここで wasm_bindgen は window.alert を wasm に引き合わせています。
備考: wasm-bindgen を使わない場合のコード
余談ですが、自動生成されたもとの内容は以下の通りでした:
pub fn add(left: usize, right: usize) -> usize {
    left + right
}

#[cfg(test)]
mod tests {
    use super::*;

    #[test]
    fn it_works() {
        let result = add(2, 2);
        assert_eq!(result, 4);
    }
}
wasm-bindgen 無しでも動きますが、機能面で不足を感じることがあるかもしれません。
lib プロジェクトのビルド
下記を実行します:
$ cargo build
出力は以下の通りでした:
    Updating crates.io index
  (...)
  Downloaded wasm-bindgen v0.2.83
  (...)
  Downloaded 13 crates (742.7 KB) in 0.87s
   Compiling proc-macro2 v1.0.49
   Compiling quote v1.0.23
   Compiling unicode-ident v1.0.6
   Compiling syn v1.0.107
   Compiling log v0.4.17
   Compiling wasm-bindgen-shared v0.2.83
   Compiling cfg-if v1.0.0
   Compiling bumpalo v3.11.1
   Compiling once_cell v1.17.0
   Compiling wasm-bindgen v0.2.83
   Compiling wasm-bindgen-backend v0.2.83
   Compiling wasm-bindgen-macro-support v0.2.83
   Compiling wasm-bindgen-macro v0.2.83
   Compiling wasm-example v0.1.0 (/(...)/wasm-example)
    Finished dev [unoptimized + debuginfo] target(s) in 23.41s
エントリポイントの作成
index.js を作成してエントリポイントにします:
$ nvim index.js
以下のように書き込みましょう:
// Note that a dynamic `import` statement here is required due to
// webpack/webpack#6615, but in theory `import { greet } from './pkg';`
// will work here one day as well!
const rust = import('./pkg');

rust
  .then(m => m.greet('World!'))
  .catch(console.error);
ここで greet が呼ばれていることに注目してください。これは今回作成した関数です。src/lib.rs で定義しています。
タスクランナーのインストール
ゴールは近くまで来ています。Webpack のための準備をしましょう。
こちらを作成します:
$ nvim package.json
中に次の内容を記述してください:
{
  "name": "<your-project-name>",
  "version": "<project-version>",
  "author": "<author>",
  "email": "<email>",
  "license": "<your-license>",
  "scripts": {
    "build": "webpack",
    "serve": "webpack-dev-server"
  },
  "devDependencies": {
    "@wasm-tool/wasm-pack-plugin": "1.0.1",
    "text-encoding": "^0.7.0",
    "html-webpack-plugin": "^3.2.0",
    "webpack": "^4.29.4",
    "webpack-cli": "^3.1.1",
    "webpack-dev-server": "^3.1.0"
  }
}
さらにこちらを作成します:
$ nvim webpack.config.js
内容を以下のようにします:
const path = require('path');
const HtmlWebpackPlugin = require('html-webpack-plugin');
const webpack = require('webpack');
const WasmPackPlugin = require("@wasm-tool/wasm-pack-plugin");

module.exports = {
    entry: './index.js',
    output: {
        path: path.resolve(__dirname, 'dist'),
        filename: 'index.js',
    },
    plugins: [
        new HtmlWebpackPlugin(),
        new WasmPackPlugin({
            crateDirectory: path.resolve(__dirname, ".")
        }),
        // Have this example work in Edge which doesn't ship `TextEncoder` or
        // `TextDecoder` at this time.
        new webpack.ProvidePlugin({
          TextDecoder: ['text-encoding', 'TextDecoder'],
          TextEncoder: ['text-encoding', 'TextEncoder']
        })
    ],
    mode: 'development'
};
準備完了です。Webpack をインストールしましょう:
$ yarn install
出力は以下の通りでした:
yarn install v1.22.19
(...)
info No lockfile found.
(...)
[1/4] Resolving packages...
(...)
[2/4] Fetching packages...
[3/4] Linking dependencies...
[4/4] Building fresh packages...
success Saved lockfile.
Done in 21.75s.
ビルドとデプロイ
ビルドを行い、その内容を公開してみましょう:
$ env NODE_OPTIONS=--openssl-legacy-provider \
      yarn build
出力は以下の通りでした:
yarn run v1.22.19
$ webpack
🧐  Checking for wasm-pack...

✅  wasm-pack is installed.

ℹ️  Compiling your crate in development mode...

(...)
✅  Your crate has been correctly compiled

(...)
Version: webpack 4.46.0
(...)
Entrypoint main = index.js
(...)
Done in 1.01s.
成功です。やりました 🙌
トラブルシューティング: yarn build が ssl プロバイダ起因で失敗
yarn build だけを実行すると (つまり NODE_OPTIONS=--openssl-legacy-provider を付けないと)、下記のようなエラーが出るかもしれません:
(...)
node:internal/crypto/hash:71
  this[kHandle] = new _Hash(algorithm, xofLen);
                  ^

Error: error:0308010C:digital envelope routines::unsupported
    at new Hash (node:internal/crypto/hash:71:19)
    at Object.createHash (node:crypto:140:10)
    at module.exports (/(...)/wasm-example/node_modules/webpack/lib/util/createHash.js:135:53)
    at NormalModule._initBuildHash (/(...)/wasm-example/node_modules/webpack/lib/NormalModule.js:417:16)
    at handleParseError (/(...)/wasm-example/node_modules/webpack/lib/NormalModule.js:471:10)
    at /(...)/wasm-example/node_modules/webpack/lib/NormalModule.js:503:5
    at /(...)/wasm-example/node_modules/webpack/lib/NormalModule.js:358:12
    at /(...)/wasm-example/node_modules/loader-runner/lib/LoaderRunner.js:373:3
    at iterateNormalLoaders (/(...)/wasm-example/node_modules/loader-runner/lib/LoaderRunner.js:214:10)
    at Array.<anonymous> (/(...)/wasm-example/node_modules/loader-runner/lib/LoaderRunner.js:205:4)
    at Storage.finished (/(...)/wasm-example/node_modules/enhanced-resolve/lib/CachedInputFileSystem.js:55:16)
    at /(...)/wasm-example/node_modules/enhanced-resolve/lib/CachedInputFileSystem.js:91:9
    at /(...)/wasm-example/node_modules/graceful-fs/graceful-fs.js:123:16
    at FSReqCallback.readFileAfterClose [as oncomplete] (node:internal/fs/read_file_context:68:3) {
  opensslErrorStack: [ 'error:03000086:digital envelope routines::initialization error' ],
  library: 'digital envelope routines',
  reason: 'unsupported',
  code: 'ERR_OSSL_EVP_UNSUPPORTED'
}

Node.js v19.3.0
error Command failed with exit code 1.
info Visit https://yarnpkg.com/en/docs/cli/run for documentation about this command.
これが env NODE_OPTIONS=--openssl-legacy-provider を付けた理由です。ERR_OSSL_EVP_UNSUPPORTED 関連のエラーを抑制してくれます。
おわりに
それでは wasm が動くか見てみましょう !!
$ env NODE_OPTIONS=--openssl-legacy-provider \
      yarn serve
出力は以下の通りでした:
yarn run v1.22.19
$ webpack-dev-server
🧐  Checking for wasm-pack...

✅  wasm-pack is installed.

ℹ️  Compiling your crate in development mode...

ℹ 「wds」: Project is running at http://localhost:8080/
ℹ 「wds」: webpack output is served from /
ℹ 「wds」: Content not from webpack is served from /(...)/wasm-example
[INFO]: Checking for the Wasm target...
[INFO]: Compiling to Wasm...
    Finished dev [unoptimized + debuginfo] target(s) in 0.01s
[WARN]: :-) origin crate has no README
[INFO]: Optional fields missing from Cargo.toml: 'description', 'repository', and 'license'. These are not necessary, but recommended
[INFO]: :-) Done in 0.11s
[INFO]: :-) Your wasm pkg is ready to publish at /(...)/wasm-example/pkg.
✅  Your crate has been correctly compiled

ℹ 「wdm」: Hash: 192d2af568ea3f4244a1
Version: webpack 4.46.0
Time: 688ms
Built at: 01/07/2023 3:17:27 PM
                           Asset       Size  Chunks                         Chunk Names
                      0.index.js    623 KiB       0  [emitted]
                      1.index.js   6.82 KiB       1  [emitted]
446639ea4b6743dab47f.module.wasm   58.7 KiB       1  [emitted] [immutable]
                      index.html  181 bytes          [emitted]
                        index.js    339 KiB    main  [emitted]              main
Entrypoint main = index.js
(...)
ℹ 「wdm」: Compiled successfully.
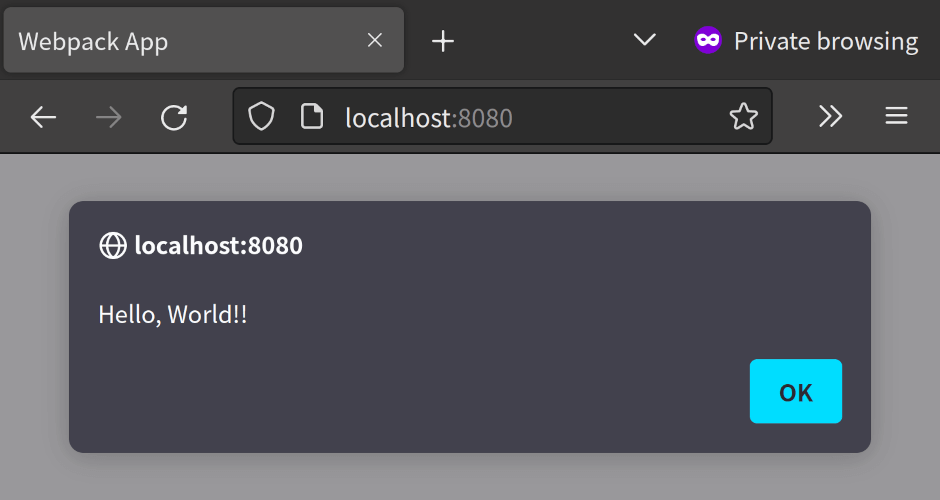
http://localhost:8080/ にブラウザでアクセスしてください。迎え入れられるはずです ☺